Introduction
In the ever-evolving world of gaming, having the right equipment can significantly enhance your experience. Among the most crucial components of a great gaming experience is a powerful gaming PC. Building your own gaming rig allows you to customize every aspect to suit your needs, preferences, and budget. This comprehensive guide will walk you through the essentials of selecting components, understanding specifications, and assembling your gaming PC.
Why Build Your Own Gaming PC?
- Customization: Building your own PC allows you to choose components tailored to your gaming style, whether you prioritize graphics, processing power, or storage.
- Cost-Effectiveness: Often, building your own rig can be more economical than buying pre-built systems. You can avoid paying a premium for brand names and focus on getting the best value for each component.
- Upgradability: When you build your own PC, you understand how each part works. This knowledge makes future upgrades easier and more straightforward.
- Satisfaction: There’s a unique satisfaction that comes from building your own machine. It’s a rewarding experience to see your vision come to life.
Essential Components for a Gaming PC
- Central Processing Unit (CPU):
- The CPU is the heart of your gaming PC. It processes instructions and manages the overall functionality of the computer. Popular choices for gamers include AMD Ryzen and Intel Core processors. A powerful CPU allows for seamless multitasking and enhances gaming performance.
- Graphics Processing Unit (GPU):
- The GPU is crucial for rendering images and driving the visuals in your games. A strong GPU allows for high frame rates and stunning graphics. Look for the latest models from NVIDIA and AMD. For 1080p gaming, consider options like the NVIDIA GeForce GTX 1660 Super; for 4K gaming, the RTX 3080 is a great choice.
- Motherboard:
- The motherboard connects all your components. Ensure that it is compatible with your chosen CPU and has the necessary slots and ports for future upgrades. Options range from micro ATX to full ATX, depending on your case size and expansion needs.
- Memory (RAM):
- RAM is essential for smooth performance, especially in modern gaming. For most gamers, 16GB is sufficient. If you plan to stream or use demanding applications simultaneously, consider 32GB.
- Storage:
- Fast storage is crucial for quick load times. An NVMe SSD for your operating system and frequently played games will significantly enhance performance. Consider adding a larger HDD for additional storage.
- Power Supply Unit (PSU):
- The PSU powers all components. Choose a reliable PSU from reputable brands with enough wattage to support your build, ideally with a rating of 80+ Bronze or higher for efficiency.
- Cooling System:
- Effective cooling is essential to maintain performance and extend the lifespan of your components. You can choose between air cooling (with fans) and liquid cooling systems. Ensure your case has adequate airflow and supports multiple fans.
- Case:
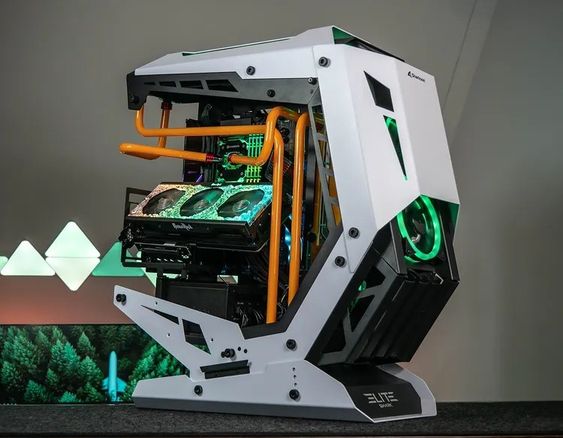
- The case houses all your components. Look for one with good airflow, sufficient space for your components, and an aesthetic that matches your style.
Steps to Build Your Gaming PC
- Preparation:
- Gather your components, tools (such as a screwdriver), and an anti-static wrist strap. Familiarize yourself with the manuals of each component.
- Install the CPU:
- Carefully place the CPU into the motherboard socket. Secure it according to the motherboard’s instructions.
- Attach the CPU Cooler:
- Follow the instructions for your cooler, ensuring it’s mounted securely to maintain optimal temperatures.
- Install RAM:
- Insert RAM sticks into the motherboard’s slots, ensuring they click into place. Check the motherboard manual for optimal slot configurations.
- Mount the Motherboard:
- Secure the motherboard inside the case using screws, ensuring it aligns with the I/O shield.
- Install the GPU:
- Insert the graphics card into the PCIe slot and secure it with screws. Ensure you connect any necessary power cables.
- Connect Storage Drives:
- Mount your SSD and HDD in their respective bays and connect them to the motherboard and PSU.
- Wiring:
- Connect all necessary power cables, including those for the motherboard, GPU, and storage devices. Tidy up cables to improve airflow.
- Final Checks:
- Double-check connections and ensure everything is seated correctly before closing the case.
- Install the Operating System:
- Power on your PC and install your chosen OS. Follow the prompts to complete the setup.
Common Issues
- PC Won’t Power On: Check all connections, ensuring that the PSU switch is on and that the power cable is properly connected.
- No Display: If your monitor doesn’t show any output, ensure the GPU is seated correctly and that the monitor is powered on and connected.
- Overheating: Ensure all fans are functioning and that there’s adequate airflow in the case. Consider reapplying thermal paste if necessary.

